
Laying Out My Planner is a continuation of a previous post. You can find Part 1 of this short series, Have I Finally Found Planner Peace? right here.
I’ve written before about the fact that, despite my desire to minimize the setup time for my planner (meta planning??), I’ve more or less settled on using dot-gridded notebooks rather than preprinted planners. So, how do I create a custom planner layout that works without spending my life down the rabbit hole of meta-planning?
My Future Log
This is probably the most time-intensive portion of my layout. That being said, I only spend time on this when I migrate to a fresh notebook. That’s 3-4 times per year at my usual usage.
The time-intensivity stems from the fact that I do hand-write the calendars.
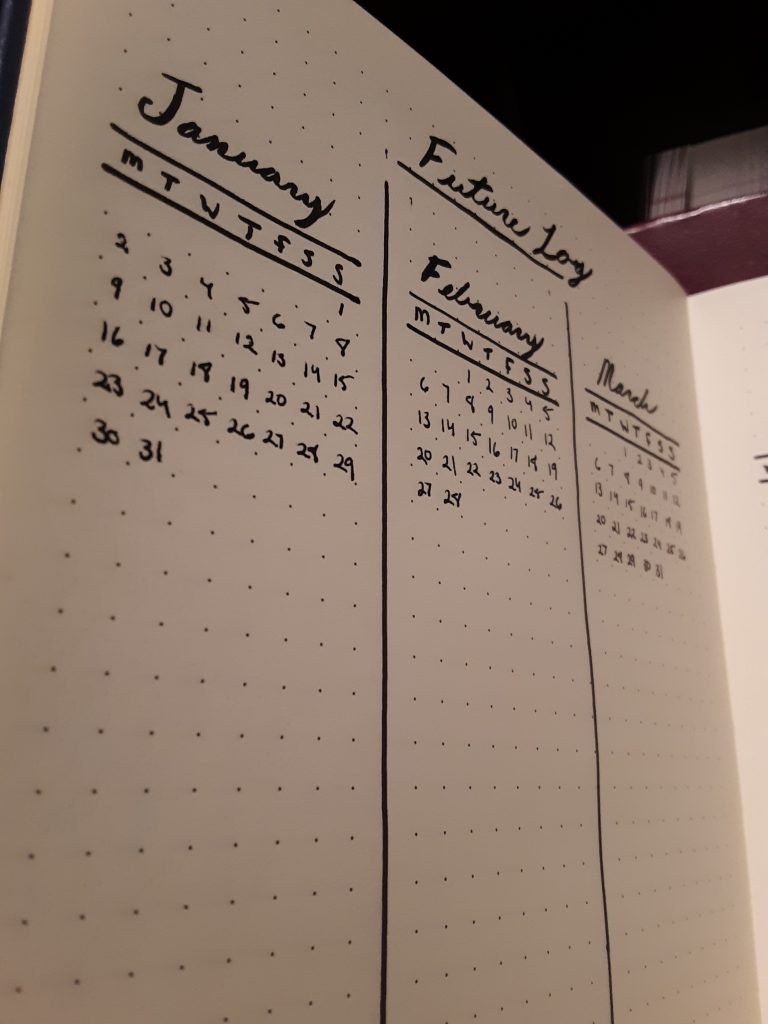
I purposely took the photos of these spreads before I added the actual content, because the entire Internet doesn’t really need to know the minutia of my plans. The blank space in each column below the month’s calendar fills in with a list of items to keep in radar for that month. I log birthdays, appointments, due dates, holidays, events, all the good stuff that isn’t ordinary routine here for 10,000 foot reference. I do use some color-coding here; a smudge of color over the calendar date, and a matching color smudge over the date next to the journal note for that day’s reminder in the list below. In this same spot, I’ll also put reminders to revisit things that don’t have a specific date
For the other stationery geeks out there…. The bold lines and days of the week are Tombow Fudenosuke hard-tip brush pens, while the header and month labels are the same pen in soft-tip. The date numbers, and the scheduling details that fill up below the calendars, are Pilot Precise V5 extra-fine rollerball. I do the color-coded pops (that you don’t see) with Zebra Mildliners.
Monthly Dashboard
This is the section that has gone through the most evolution recently. The left-hand side of this spread may look pretty familiar… it’s basically the verbatim Ryder Carrol Monthly Log. It takes me about 3 minutes to sort out the days and dates at the start of a new month, and another couple of minutes to migrate relevant items from the Future Log to the appropriate lines. I also like to add my color-coding here, just for a pop of color and to make holidays, appointments, and events stand out.
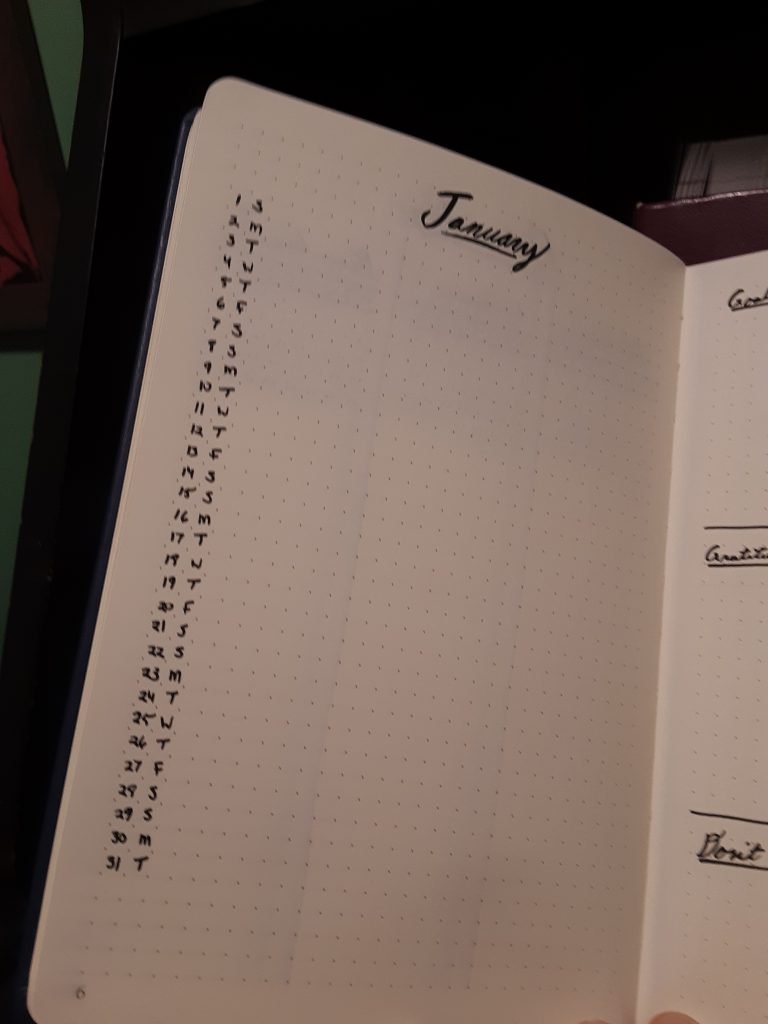
The right-hand side of the spread is an adaptation and amalgamation of a couple of spreads gleaned from too much time planning vicariously on YouTube. I’ve separated the page into 5 sections. Goals is for bigger projects and things I want to complete for the month. Tasks is where I brain-dump recurring to-dos. Gratitude is a space for quick jots of things that I’m thankful for during the month. Monthly Reflection reminds me to make notes of the month overall before I move on to the next one. The fifth space is for brain-dumping future reminders; things like shorter notice events, or items that might land in the “Goals” section the next month.

All in all, I can lay out this full spread in about 15 focused minutes, once per month.
Weekly Dashboard
This setup took me the longest time to perfect, but I’ve been using it very consistently for about a year. Just one page, and I lay it out on Sunday mornings in about 10-20 minutes.
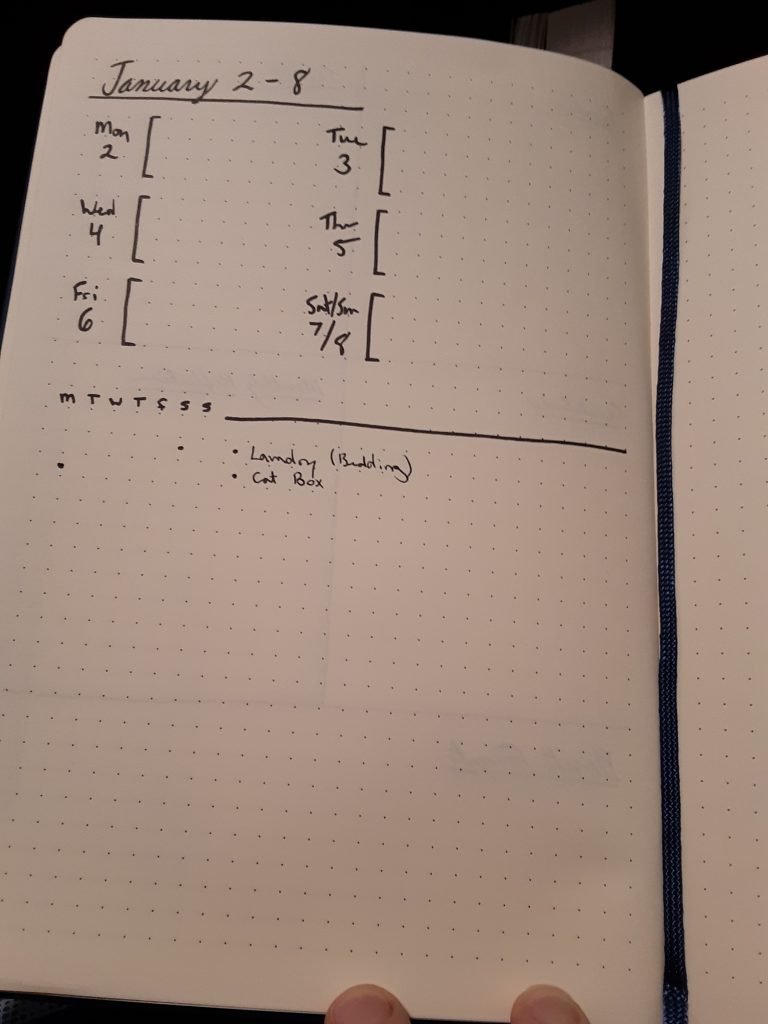
The top half of this single-page dash is a quick glance at the week. I put big-ticket items, like holidays, events, and deadlines here, migrated from the Monthly Log. This helps me orient myself within the week, and keep track of anything that might cause me to adjust my usual routine.
The bottom half is a riff on the Alastair method to track and organize my to-do’s for the week ahead. My list is part recurring weekly ritual and life rhythms, and part keeping larger goals, events, and projects in mind. Sunday mornings, over coffee, I list what needs to happen that week, usually referencing the previous week and the monthly log to make sure that I don’t lose track of the very mundane recurrences, plus a brain dump of more irregular tasks. Once I have my list, I place a dot on its line for the day of the week that it happens. As another example, I usually deep clean the cat box on Mondays, so the dot goes there. If something happens multiple times in a week, I use a dot for each day, and connect them as I go.
Today
The last routine section layout is my daily. It’s a little bit fancy compared to the rest of my spreads. I do like using a bit of washi tape behind my header for a pop of color and decoration, and accenting the date and to-do header with Mildliners.
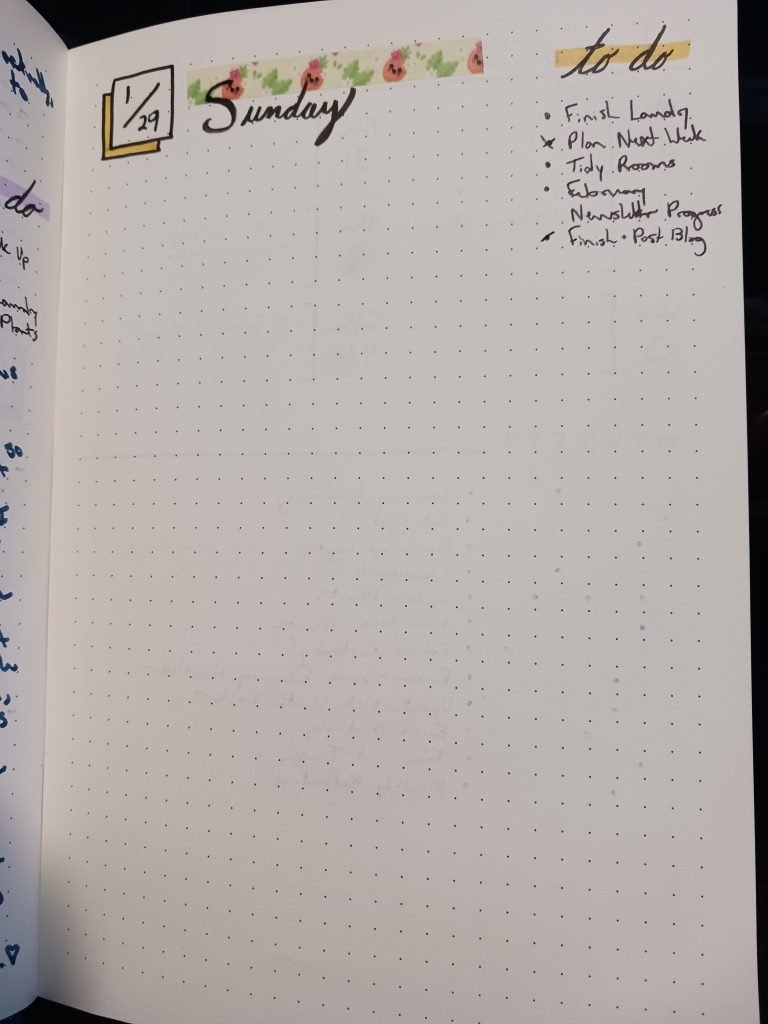
My to-dos are migrated each morning out of the weekly dashboard, and I’ll add extras as they crop up. At the end of the day, I fill as much of that blank space as I need with a bit of a personal diary entry. Sometimes that only takes a few lines, and I’ll have the next day’s header just a little further down the same page. Sometimes I’m verbose and take a full page or two or three. I love the flexibility to use what space I want or need.
Conclusion
Well, there it is! The core setup of my daily driver planner/bullet journal! I do occasionally add an extra spread or collection, but this layout is the vast majority of my second brain. I hope it gives you some inspiration, and a little insight into how I get everything on my radar organized. Let me know what you think in the comments – I’d be glad to dive into more detail if there’s interest in going further down this rabbit hole, and I’d love to hear your suggestions for how a good system might get even better!
If you liked this post, you may also enjoy this one, a musing on creativity, where it comes from, and how to cultivate it.
Until next time, may the Muse be with you!
Be First to Comment